How to use SynD
Installation
Running syND
Download the latest version of SynD. You need MATLAB version 2009a or later to run SynD with image toolbox and statistics toolbox installed, as it makes use of functions not available in older versions. You can download the file either as a tar.bz2 or as a zip archive. Uncompress the file using your favourite archiving tool into a SynD directory of your choice.
Download page for SynD.
Start MATLAB and make sure you are in the SynD directory. Type SynD_extract to start the program (or SynD_extract2017 for new version). The procedure is divided into five steps; loading an image, detecting the soma, detecting neurites, detecting synapses and finally exporting the results.
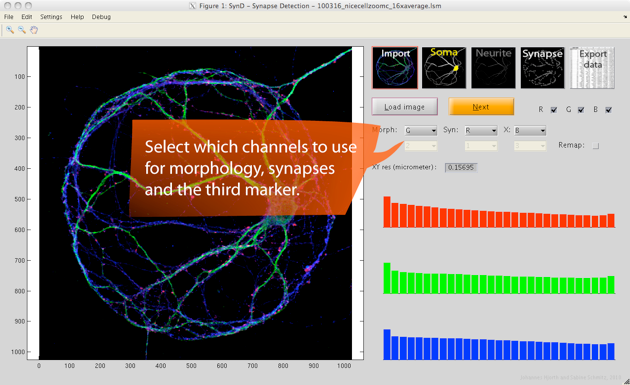
Step 1. After loading an LSM or TIFF file, the first thing to do is to specify which channel (1,2,3) contains which information (morphology, synapse, protein X) and which colour (red, green, blue) you want that channel to be represented by. If needed you can adjust the brightness of each colour by clicking on the histograms to the right (the logarithm of the intensity is shown).
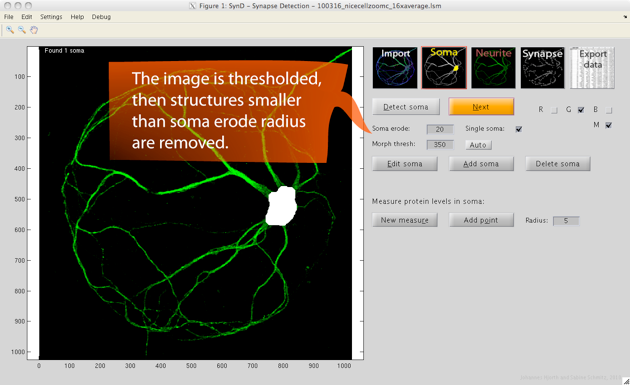
Step 2. After pressing next to proceed, the soma is automatically detected by thresholding the image then removing all but the largest connected component, and after that performing an erosion followed by a dilation.
If no soma is found, try lowering the threshold or the erosion radius. The erosion radius should be large enough to remove the neurites, but smaller than the soma radius. The soma mask can be manually modified by choosing edit soma. Drawing with the left mouse button held down adds to the mask, and the right mouse button removes from the mask.
After detecting the soma, the user can opt to place ten random regions within the soma to measure protein levels. The regions can be moved manually by right clicking on the circle in the centre if it would be desirable to avoid measuring the nucleus.
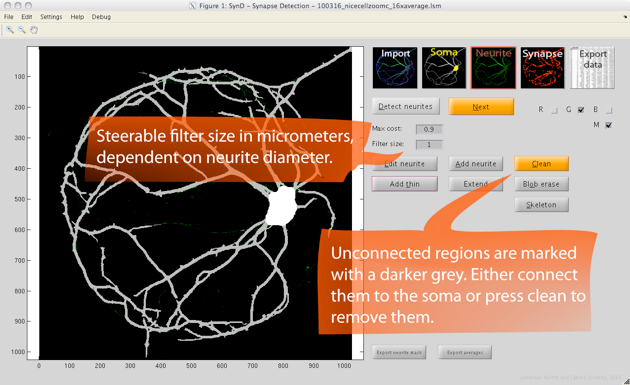
Step 3. Neurite detection is done using steerable filters. Starting from the soma, the algorithm adds pixels to the neurite mask as long as the cost of doing so is lower than a specified threshold.
If needed, the width of the steerable filter can be changed in the setting to allow detection of neurites in images with lower resolution.
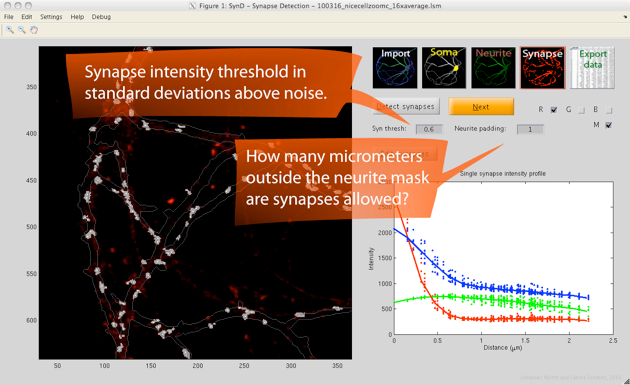
Step 4. The synapses are automatically detected by using a two-step procedure. First, the pixels are classified as background or synapses. In the second step, synapse centres are detected by deconvolving the image with a single synapse template, which allows overlapping synapses to be separated.
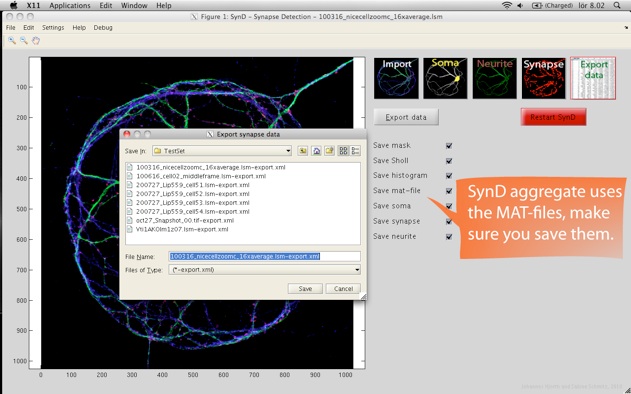
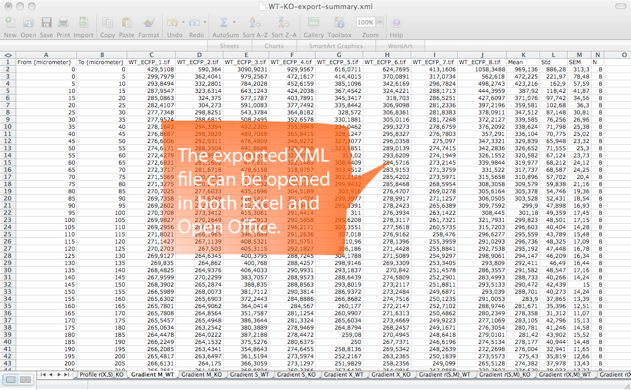
Step 5. SynD exports the results to an xml file readable by both Excel and Open Office. The intensities of the different channels at the synapses are stored, together with Sholl analysis, neurite length and a number of other statistical measures. The results from multiple files can be merged into a single xml file using SynD_aggregate.m if the mat files were saved when exporting the results.
Feedback
For help with how to use the program, please contact Sabine Schmitz (now Mosch), for bug reporting or feature requests please contact Johannes Hjorth.
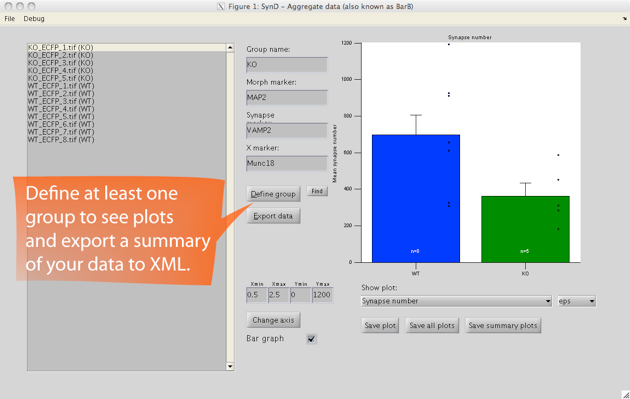
After you have processed your entire data set of images, you can open up the saved MAT-files in SynD aggregate to summarise the data into an XML file readable by Excel. It is also possible to generate plots and save them as eps, pdf or png files.
SynD exports the number of detected synapses, total dendritic length, number of synapses per unit length, synapse area, average channel intensities at the synapses, binned intensity data for histograms, Sholl analysis of neurites and synapses, single synapse profiles and intensity gradients along neurites.